I know that during this quarantine phase, everyone has taken on a love for at-home DIY project––including me and my husband. We first started with our patio and now our family room. We got it painted last year and to be honest, I don't know what I was thinking when I had my accent wall painted blue. Well, I take that back, I do know what I was thinking.
I was trying to bring the "beach" to my home by having my accent wall blue (like the sea), the outside walls grey, and my kitchen beige (the sand). But after some time passed, I wasn't fond of the idea. Plus, my husband started working on the floor and never finished. Hey, I give him his props he did start, but the floor hasn't been finished... and it's been a year!
With that in mind, I put on my creative cap and got to work on giving my living room a total makeover.
This was my step-by-step process on elevating my home with a DIY accent wall:
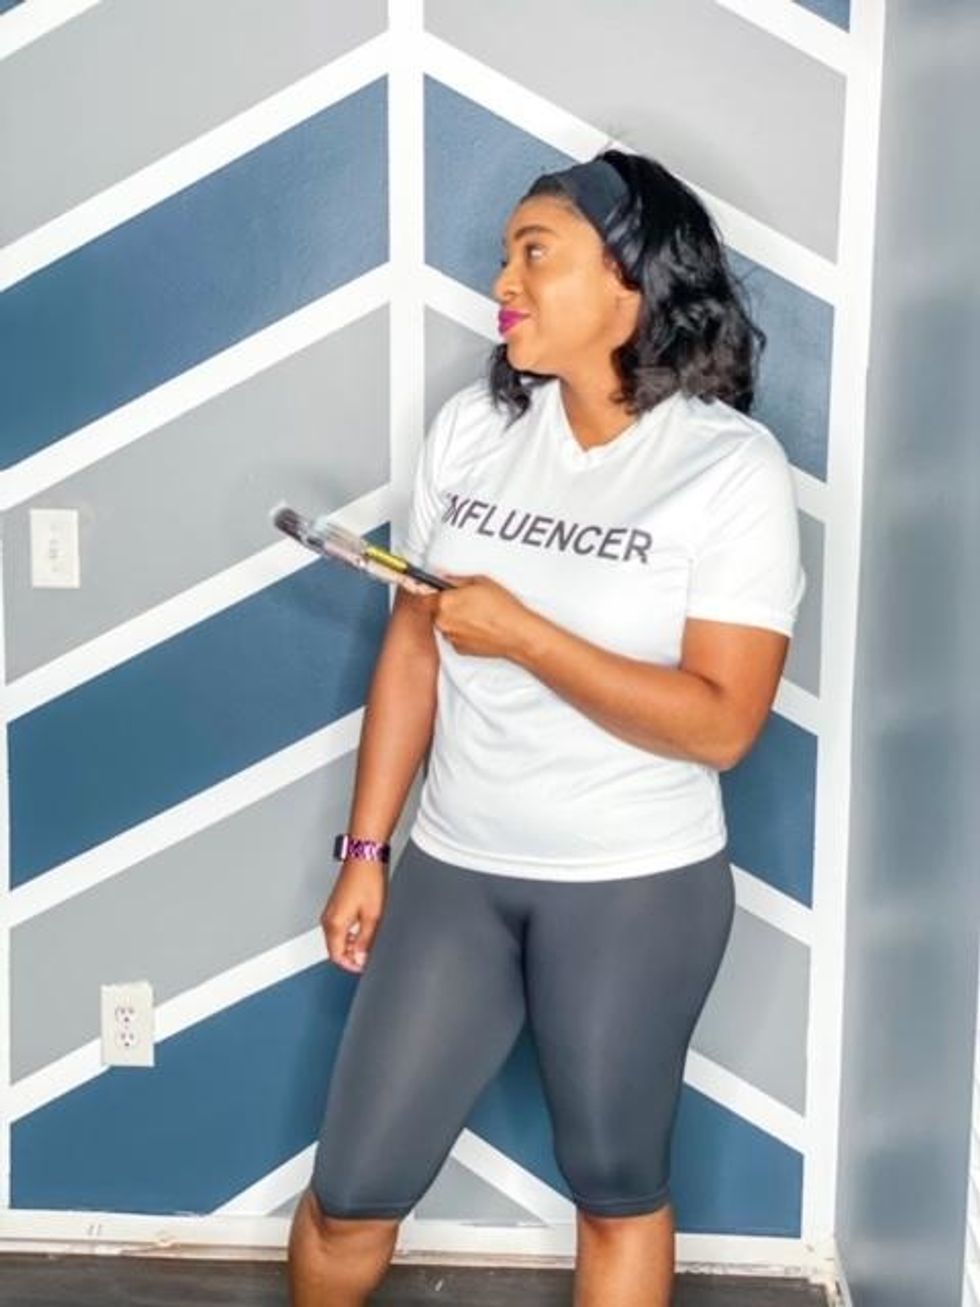
Here's what you'll need:
- 1-gallon white paint
- 2 thick paint brushes
- 2 large paint rollers
- 2 small paint rollers
- 1 steady hand
- 2-3 rolls of frog painters tape (Lowes guy said it works better than the blue tape)
- 3 paint buckets
- A couple of old blankets to cover the floor
- 1 ladder
- 1 measuring device
- 1 pencil
Being home, I was able to allow my creative juices to flow thinking of how I wanted to change my family room. I wanted to keep the grey theme and didn't want to do a lot of work, if you know what I mean. So I started looking up different ideas for accent walls. I did toy with the idea of wallpaper but my husband wasn't down with that plan. I also was thinking about painting it just one solid grey color, but that would be too plain for the vibe I was going for.
I took to Pinterest and saw a chevron print and fell in love. Y'all, I looked high and low for a chevron print stencil and I've seen others do their walls with a stencil, but I couldn't find one large enough. The small ones would have taken days maybe even weeks to finish. My husband is an Architect Designer, so I asked him if he thought he would be able to do it with tape and he was like, "Oh yeah, I can do that!"
Step Two: Painting

We first had to paint the wall white. Thank God for my husband because I was going to do it all backwards. I was going to tape it then paint it white, my husband informed me that if we did it that way, we would be painting for days and then it wouldn't have looked right.
Step Three: Taping

Next up is taping. I am going to be honest I didn't know that "math" was going to be involved. I seriously thought that all we had to do was put tape up in zigzags. Again I thank God for my husband who brought me back to reality real quick.
You need to measure your wall from top-to-bottom and side-to-side. It's important for you to have in mind how many patterns you want. I wanted six in total. So my husband measured and taped the wall according to his measurements. Keep in mind that everyone's measurements will be different because it's according to your wall size.
Now here is where the math comes into place again. To get the chevron print, you have to place the tape on the wall in a zigzag shape. My husband measured for each zigzag to be two-feet apart. And you follow this throughout the entire wall following the taped-off sections, moving from top to bottom.
Step Four: Fill In The Blanks

Now, this is where the fun and intense part starts! You need to have your two colors picked out. I chose a light grey and a darker grey. Go over with a pencil in each zigzag and write in the color you want to paint in each zag. Use your roller to paint the color in each section. To make it easier, my husband had one color and I had another, that way we didn't get it mixed up.
Be careful and don't go too fast you can mess up easily if you're not paying attention! After you have done this, let it dry for a little bit. Then, you carefully take the paint off and boom!
The Final Reveal

Can you say WOW? It doesn't even look like the same room. If you ask me, it looks like something out of the Southern Living Magazine! We did that!
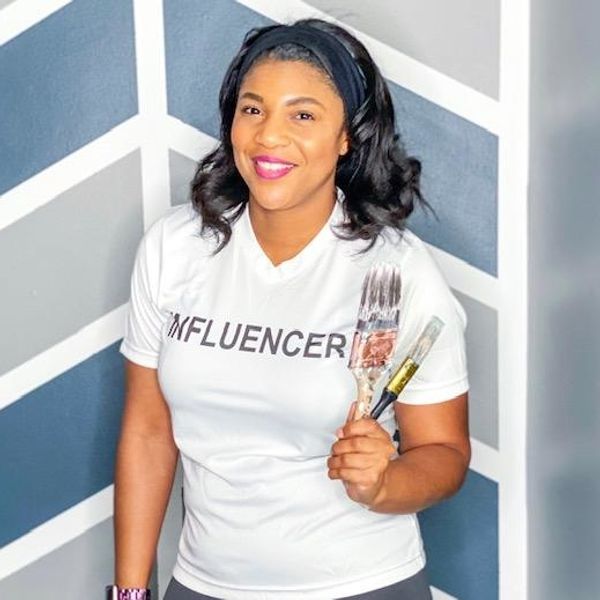
Featured image by Tamron Little.
Tamron can be best described as a millennial southern lady lving her best life as a cancer survivor! Tamron inspires the everyday woman through faith, lifestyle, and her passion for fashion! Her goal is to encourage women through her testimony while sharing her light and life as a working mom, and wife.
Wife • Mom • Influencer
There’s just something about HBCU Homecoming that just hits different. Whether it’s your first time stepping onto the yard since graduation or you’re a regular at every Homecoming tailgate, HBCU pride is undeniable. It’s a vibrant celebration that unites the legacy of excellence and tradition with the energy and resilience of Black culture.
The experience goes beyond a typical college reunion; HBCU Homecoming is a family reunion, a fashion show, a cultural festival, and a week-long turn-up that embodies what it means to be unapologetically Black and educated. For HBCU alumni, the journey back to the yard each year is rooted in a love and pride that’s hard to put into words but impossible to deny.
From statement pieces to tech must-haves, every item represents the intersection of Black pride and HBCU love, ensuring that you show up to the yard in style and with intention. So whether you’re repping your alma mater for the first time since graduation or looking for fresh pieces to express your HBCU pride, these essentials will have you standing out, because, at HBCU Homecoming, it’s not just about showing up—it’s about showing out.
Thread Goals
diarrablu Jant Pants in Alia Noir

High-waisted, wide-legged, and ready to shut down the yard, the Jant Pants by diarrablu bring a whole new meaning to campus chic. Handcrafted in Dakar, Senegal, these free-flowing jacquard pants are perfect for stepping onto the yard with style and ease—making them a must-have for any HBCU alum’s closet.
Silver & Riley Convertible Executive Leather Bag Classic Size in Olive

This all-in-one luxury bag isn’t a bestseller for nothing. The Silver & Riley essential is made of Italian calfskin leather and thoughtfully designed, as it can be worn in four different ways: a shoulder bag, crossbody, a top handle, and a backpack. Chic and elegant, the Convertible Executive Leather bag is “the bag that every woman needs in her collection.”
Renowned Women's Intuition Cotton Graphic T-Shirt

Renowned
Renowned’s Women’s Intuition Cotton Graphic T-shirt features a bold graphic print inspired by the power and essence of women’s intuition. With its striking design, this all-cotton tee is a vibrant thing, making it a statement piece that celebrates feminine energy.
Mifland Million M Mesh Crop Shirt

Talk about bold, the Million M Mesh Crop Shirt combines edgy style with comfort, featuring Mifland’s signature print on a semi-see-through mesh fabric. Show up and show out in sophisticated flair.
HBCU Love FUBU
Melanin Is Life Melanated & Educated - I Love My HBCU Hoodie

Show off your HBCU love with this piece that represents everything you gained from your alma mater: a top-tier education, a community that lifts you up, and a deep sense of esteem for yourself and your culture. Wear it loud and proud, because being melanated and educated isn’t just a flex—it’s a legacy.
HBCU Culture Spelmanite Sweatshirt in Navy

Spelmanites, rep your Spelman pride with this unisex crewneck sweatshirt, designed for ultimate comfort and a relaxed fit. Made from a cozy cotton/polyester blend, this classic sweatshirt is as durable as it is stylish—making it an ideal piece for any Spelmanite showing love for their alma mater.
HBCU Culture Howard Is The Culture T-Shirt

Rock the ultimate flex by showcasing your Howard U love with HBCU Culture’s Howard Is The Culture t-shirt. This unisex tee offers a comfortable, relaxed fit that’s perfect for celebrating your HBCU spirit without sacrificing style or comfort.
DungeonForward FAMU - Strike Bucket - Reversible

DungeonForward’s Strike Bucket Hat brings versatility and style to the FAMU Crown collection with its reversible design, giving you two looks in one. Featuring a sleek black snakeskin-embossed brim lining and a bold outline Rattler emblem, this hat is all about repping your Rattler pride in style.
DungeonForward Savannah State University - HBCU Hat - TheYard

The Savannah State University HBCU Hat by DungeonForward is more than just a hat—it’s a symbol of Tiger pride and a nod to the culture. Perfect for gamedays, tailgates, or just showing off your HBCU love, this hat lets you carry a piece of the yard wherever you go.
Tech the Halls
Anker iPhone 16 Portable Charger, Nano Power Bank

Stay charged up with the Anker Nano Power Bank, which features dual USB-C ports, a foldable connector, and a compact design, making it perfect for those HBCU tailgates and late-night parties you pull up to.
Drip Check
Wisdom Frame 14 Square Sunglasses

Elevate your look with these angular square-frame sunglasses by Wisdom, bringing an ultramodern edge to any outfit. The sleek design makes them perfect for blocking out the haters while you stunt on the yard.
Coco and Breezy Eyewear Fortune in Gray Turquoise

The Fortune Glasses in Grey Turquoise is a bold statement piece to any Homecoming weekend ‘fit that “embody our fearless and outspoken DNA.” With their color and edgy design, these frames by Coco and Breezy are perfect for anyone looking to stand out and express their unapologetic confidence.
Howard U Lapel Pin

Rep your Bison pride wherever you go with this Howard U Lapel Pin from Pretty AmbVision. Whether adding it to your jacket, shirt, or bag, this pin is the perfect way to showcase your love for your alma mater while rocking your HBCU love with honor and distinction.
Mifland Standard Rucksack Mini
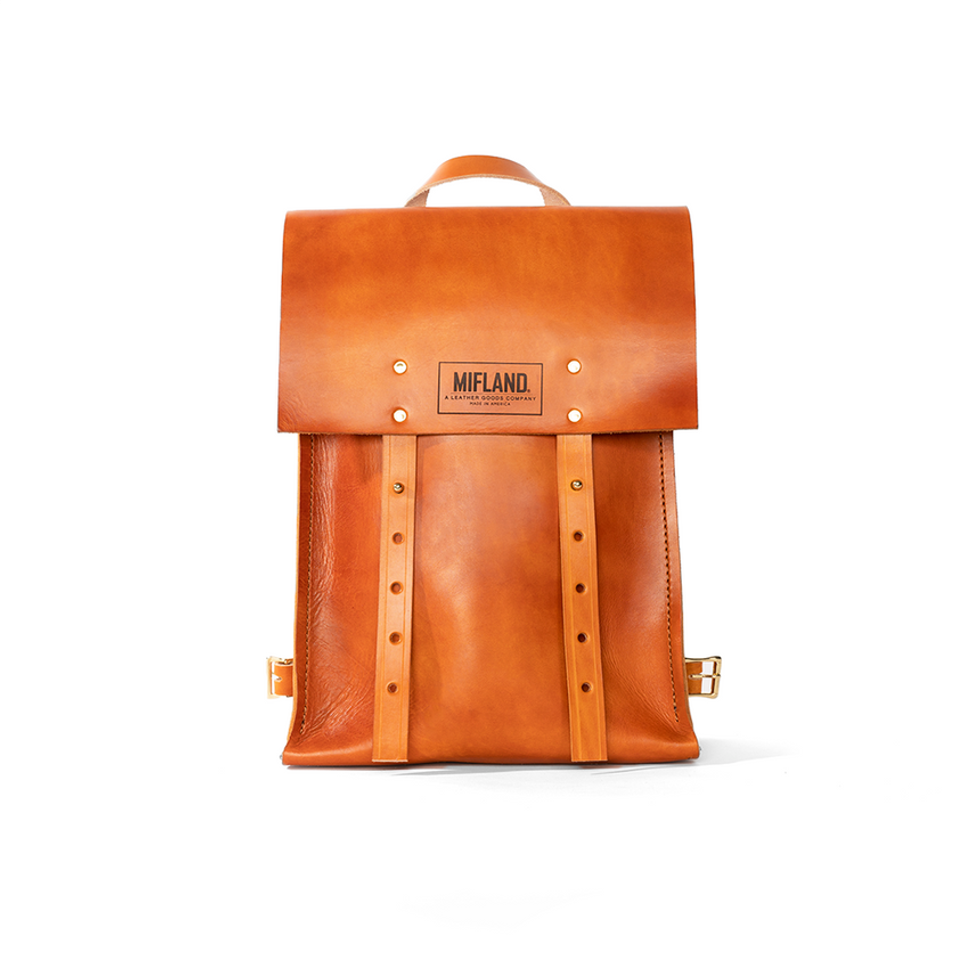
The Standard Rucksack is designed to evolve like that HBCU pride—getting richer, bolder, and better with time. Durable, stylish, and built to last, this Rucksack by Mifland is a timeless piece equipped with versatile carrying options and fully adjustable back straps for ultimate comfort.
Stay Fresh, Stay Blessed
Slip Pure Silk Sleep Mask in Pink

Keeping it cute starts with beauty sleep. This luxurious silk mask is an essential for a reason. If protecting your skin and waking up refreshed is your priority, look no further than this Homecoming essential.
Liquid I.V.® Hydration Multiplier Lemon Lime - Hydration Powder Packets

Stay hydrated and energized throughout Homecoming weekend with this Liquid I.V.® Hydration Multiplier in Lemon Lime. Just add a packet to your water bottle, and bless your body with 2-3 times more hydration than water with every packet. Because staying hydrated is the key to popping up and showing out all weekend long!
Loop Experience Plus Earplugs High Fidelity Hearing Protection

Designed for your hearing protection, these sleek earplugs reduce noise without compromising sound quality—perfect for enjoying the band’s halftime show, late-night parties, and DJ sets. Whether you’re front row at the step show or hitting the yard, your ears deserve to be protected in style!
Black Girl Magic Glass Cup

Sip in style and celebrate your melanin with the Black Girl Magic Glass Cup. Perfect for morning coffee, your favorite iced drink, or showing off your HBCU pride on the yard—this cup is all about keeping it cute while radiating your endless supply of Black Girl Magic.
Glow Up & Show Out
Black Girl Sunscreen SPF 30

What Homecoming weekend can be complete without an assist from this beauty find? Formulated to blend seamlessly into melanin-rich skin (no white-cast), protect your glow while you turn up with the Black Girl Sunscreen SPF 30.
Sienna Naturals Issa Rae's Wash Day Ritual Set

Issa Rae’s Wash Day Ritual Set from Sienna Naturals includes the H.A.PI. Shampoo, the Plant Power Repair Mask, Dew Magic, and Lock and Seal to get your crown right. Whether you’re repping your coils or rocking a new color on the yard, these products restore and nourish your strands, keeping your hair healthy, strong, and Homecoming-ready!
54 Thrones Ivorian Cocoa + Ghanaian Coconut Beauty Butter

Stay glowing from the tailgate to the after-party with the 54 Thrones Ivorian Cocoa + Ghanaian Coconut Beauty Butter. Infused with African-sourced ingredients, this rich, multi-purpose butter is the answer to keeping your skin soft and radiant through all the festivities all Homecoming long.
Saie Glossybounce Hydrating Lip Oil

Keep your lips looking luscious and nourished with the Saie Glossybounce Hydrating Lip Oil. Perfect for adding an extra pop to your pout before hitting the yard or freshening up between events, this lip oil is a beauty essential for staying camera-ready all weekend.
Join us in celebrating HBCU excellence! Check out our Best In Class hub for inspiring stories, empowering resources, and everything you need to embrace the HBCU experience.
Featured image by Visual Vic/Getty Images
Seven Fashion Girlies Share Their 'Rich Girl Energy' Outfit Formulas
As the summer has wound down and the leaves have begun to turn, many of us have entered a busy fall season.
After a slower pace, it's time to embrace the grind with extra grace once more. To help you transition seamlessly into this hectic period, we've compiled a collection of outfit ideas that embody the "I don't chase, I attract" and "I got money everywhere" mindset.
Inspired by popular influencers and their signature outfit formulas, these looks are designed to make you feel confident, abundant, and ready to conquer anything that comes your way. Get ready to channel your inner rich girl energy and step into fall with style!
Amy Lefevre
New York

Amy
Courtesy
The outfit formula that makes her feel like abundance is her birthright: “Wearing a fitted dress with oversized coat or blazer makes me feel confident, chic, and comfortable.”
Her go-to pieces that make her feel confident and powerful:“My trench coat and cute tote bag.”
How she accessorizes: “By adding lots of jewelry and sunglasses.”
Colors and patterns she finds most flattering: Neutral tones
Follow Amy on Instagram @lefevrediary.
Devana Turner, Creator and Stylist
Durham, NC

Devana
Courtesy
The outfit formula that makes her feel like abundance is her birthright:"Pairing wide-leg pants with tops or jackets that have balloon sleeves makes me feel powerful and on top of the world. The wide-leg pants give off effortless elegance, while the voluminous balloon sleeves add drama and sophistication. It’s a fit that’s unapologetic—it takes up space and commands attention."
Go-to pieces that make her feel confident and powerful: "My Aritzia effortless trousers, maroon Yankees fitted cap personalized with brooches, and Dior Saddle Bag. Each piece combines comfort with authority."
How she accessorizes: "Brooches elevate any look, adding personalization and character. Sunglasses or stylish frames tie my outfits together, adding polish and a sense of mystery."
Colors and patterns she finds most flattering: Neutral tones, bold colors, animal prints.
Follow Devana on Instagram @devanaturner.
Amiraa Vainqueur, Fashion Stylist and Style Expert
Los Angeles, CA

Amiraa
Courtesy
The outfit formula that makes her feel like abundance is her birthright: "Tailored trench with bold accessories: Think belted trench coat worn as a dress with knee-high boots and oversized sunglasses. The trench coat feels both classic and powerful when styled intentionally. Luxury athleisure: silk or satin sweatsuit with luxe sneakers and a quilted bomber jacket. Comfort meets luxury."
Go-to pieces that make her feel confident and powerful:"I love a tailored power suit—it always makes me feel confident."
How she accessorizes:"I am a maximalist, layering jewelry and sunglasses to elevate every look."
Colors and patterns she finds most flattering: Neutral tones, bold colors, soft pastels, animal prints.
Follow Amiraa on Instagram @amiraavainqueur.
Tonaya Lorenne
Chicago, IL

Tonaya
Courtesy
The outfit formula that makes her feel like abundance is her birthright:"I’m a 90s baby, and I translate that era’s fashion into my personal style. Bold colors, luxurious textures, and chic bottoms make me feel empowered and in alignment with my purpose."
Go-to pieces that make her feel confident and powerful:"My go-to lately has been small tops paired with oversized bottoms. I love the boldness, and I’ve stopped worrying about unflattering fits—power comes from owning my look."
How she accessorizes: "Hats, glasses, funky rings, and statement bags complete my looks, especially since I have short hair. Accessories are essential to my style."
Colors and patterns she finds most flattering: Neutral tones, bold colors, soft pastels, geometric patterns, animal prints.
Follow Tonaya on TikTok @_tonayalorenne.
Kéla Walker, Media Talent
Brooklyn, NY

Kéla
Credit: Shatimah Brathwaite
The outfit formula that makes her feel like abundance is her birthright: "I’m a magnet for matching sets and monochromatic looks. Dressing for my body type is key—balancing tight tops with loose bottoms creates harmony in my outfits."
Go-to pieces that make her feel confident and powerful:"Statement accessories like a strong-shoulder blazer or an exaggerated waist-cinching belt are my go-to's."
How she accessorizes: "From purses and heels to rings and arm candy, I never leave home without great shades to tie everything together."
Colors and patterns she finds most flattering: Neutral tones, bold colors, animal prints.
Follow Kéla on Instagram @kelawalker.
Opal, Creative Director at Lapo Lounge
Brooklyn, NY

Opal
Courtesy
The outfit formula that makes her feel like abundance is her birthright: "My go-to outfit formulas include bold monochromatic looks, structured suiting, and slip dresses. These serve as a canvas for my bold jewelry and accessories."
Go-to pieces that make her feel confident and powerful:"I often reach for a slip dress or a structured blazer. These staples give me easy elegance, whether dressed up with cool boots or layered for work."
How she accessorizes: "Chain belts and bold jewelry are my essentials. I love layering long necklaces or opting for bold chokers to elevate simple outfits."
Colors and patterns she finds most flattering:Neutral tones, bold colors.
Follow Opal on Instagram @opalbyopal.
Annette Walter, UrbanKinksNCurls
New York, NY

Annette
Courtesy
The outfit formula that makes her feel like abundance is her birthright:"An oversized blazer, mini pleated skirt, and fly boots are my favorite combination for feeling like that girl. Gold accessories in abundance complete the look."
Go-to pieces that make her feel confident and powerful: "I’m obsessed with oversized blazers and dope edgy boots. They can dress up or down any outfit and make a powerful statement."
How she accessorizes: "Gold accessories, especially layered necklaces and chokers, are a must. I’m also starting to build my collection of rings to add more flair."
Colors and patterns she finds most flattering: Neutral tones, bold colors, geometric patterns, animal prints.
Follow Annette on Instagram @urbankinksncurls.
_____________
Matter of fact, the next time you get dressed, we empower you to say one of these affirmations as you also employ some of these outfit formulas:
- I radiate opulence and abundance with every outfit I wear.
- My style exudes confidence, power, and grace.
- I attract success and prosperity effortlessly.
- My wardrobe reflects my inner rich girl energy, making me feel unstoppable.
- I dress to impress myself, leaving a lasting impression wherever I go.
Let’s make things inbox official! Sign up for the xoNecole newsletter for love, wellness, career, and exclusive content delivered straight to your inbox.
Featured image courtesy


