

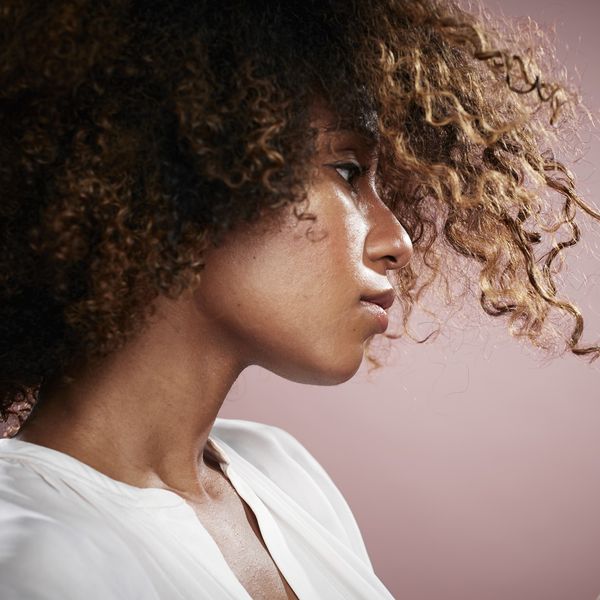
I'd like to say my signature style would consist of a classic two-strand twist out.
It works every time, and I pretty much have the technique down to a science. But, occasionally I do get bored with this style and want to achieve a different type of curl. Enter stage left, the Bantu Knot Out, a style I've been eager to try for quite some time.
Now, what are Bantu Knots, you ask?
 Courtesy of McKenzie Renae
Bantu Knots result in the style of springy “curly q" curls or a pretty loose wave. I've noticed they are springy on girls with shorter natural hair (think ears and up) and more of the wave or loose curl on girls with longer natural hair (think mid-neck/shoulder length down). They can be done on any hair texture or type, and will totally change the look and curl of your hair.


This was my experience. Excuse me in advance for the low resolution, these photos were taken with my iPhone and not my camera.
How To: Bantu Knot Twist-Out On Natural Hair
What You Will Need:
- A spray bottle filled with water and part leave-in conditioner of your choice
- Bobby pins or pin curl clips
- A comb or Denman brush (I used my fingers to separate into sections, and detangled with the brush.)
- Styling product of your choice (I used a light mixture of Lottabody Curl Milk and Curls Blueberry Bliss Control Jelly)
- A styling serum or oil for the takedown (I used Castor Oil)
- Patience and a lot of drying time
Bantu Knot Twist-Out: Instructions
Step 1:

Courtesy of McKenzie Renae
I started with dry, semi-dirty hair. Probably a little over a week old.
Step 2:

Courtesy of McKenzie Renae
I parted my hair into sections and took a spray bottle filled with water and part leave-in conditioner, sprayed each section and applied a little curl milk and control jelly section by section. Because my hair was dry after spraying, I detangled with my Denman brush before applying additional product.
NOTE: The sections should be damp, NOT soaking wet. This will save you a lot of extra drying time.
Step 3:

Courtesy of McKenzie Renae
After separating, twist the hair around in a circular motion until it's in a coil. Almost like twisting a wet towel into a coil before you smack someone with it (or am I the only one who's done that? lol). Tuck the ends of your hair in the coil, and use a bobby pin or pin curl clip to hold them in place so they don't unravel as they dry. Repeat this step all over.
I would say I had a total of maybe 25 knots once I was done. I made the back and sides a little smaller so my curl pattern would be a little tighter around that area, because that's just how I like it. It's important to allot plenty of time and patience and to keep your coils neat because this will determine how they dry in the end style.
Step 4:

Courtesy of McKenzie Renae
You have two options once your knots are finished. You can sit under the dry for a couple of hours, or you can let your knots air dry for 24-48 hours. Remember, your hair will be tightly knotted up, so air will take longer to get in to actually dry your hair. If you take them out before they are dry, you will not get the desired look you want.
Step 5:

Courtesy of McKenzie Renae
I took them down similar to how I take out my twist-out. I applied a little castor oil onto my fingertips and gently took them out and separated them one by one. I don't have the photo of how they looked before I fluffed them out, but I used my fingers again to fluff from the roots and made sure no sectioned parts were visible.
Learning Lessons:
- Although I thought my hair was completely dry after sitting under the dryer, it wasn't. What resulted was frizzy curls around the crown of my head. I'll probably devote a whole day to this look next time or sit under the dryer a tad bit longer. So please allow ample drying time!!
- Honestly, I felt like a little baby doll with this style. I already look younger than my age, so that's not exactly the look I'm going for.
- The style lasted three days for me then I was over it. There wasn't an easy way for me to maintain the look at night, and like my twist-out, it just didn't get better at three day "old old" hair.
I'm glad I finally did this look and tried something different, but it's just not for me. I might give it one more shot considering this was my first time doing this style. Who knows, maybe a longer length or knotting on clean hair will make a difference.
Better yet, next time maybe I'll leave my hair in the knots and rock it Rihanna-style.
How do you think I did on my first attempt?
- Jumbo Bantu Knots: - xoNecole: Women's Interest, Love, Wellness ... ›
- 14 Frohawk Styles You Can Easily Achieve - xoNecole: Women's ... ›
- How to Finger Coils Finger Twists Natural Hair - xoNecole: Women's ... ›
- 4 Easy Protective Styles You Can Do Yourself - xoNecole: Women's Interest, Love, Wellness, Beauty ›
- 9 Frohawk Styles You Can Easily Achieve - xoNecole ›
- Bantu Knot Outs on Different Textures and Lengths | Un-ruly ›
- Bantu Knot Out on 4C Natural Hair ›
- Easy Bantu Knots for All Hair Types! – A Beautiful Mess ›
- How to Create Bantu Knots & Bantu Knot-Outs ›
- Bantu Knots Tutorial Plus 25 Hot Pictures ›
- How to Bantu Knot Out: Natural Hair Basics | CurlyNikki | Natural ... ›
- How to Do A Bantu Knot-Out (Even On Short Curly Hair ... ›
RELATED


While speaking to xoNecole, Eva shares that she’s a lot like the beloved 1994 character in many ways. “Lyric is so me. She's the odd flower. A flower nonetheless, but definitely not a peony,” she tells us.
“She's not the average flower you see presented, and so she reminds me of myself. I'm a sunflower, beautiful, but different. And what I loved about her character then, and even more so now, is that she was very sure of herself.
"Sure of what she wanted in life and okay to sacrifice her moments right now, to get what she knew she deserved later. And that is me. I'm not an instant gratification kind of a person. I am a long game. I'm not a sprinter, I'm a marathon.
America first fell in love with Eva when she graced our screens on cycle 3 of America’s Next Top Model in 2004, which she emerged as the winner. Since then, she's ventured into different avenues, from acting on various TV series like House of Payne to starring on Real Housewives of Atlanta.

Je-Caryous Johnson Entertainment
Eva praises her castmates and the play’s producer, Je’Caryous for her positive experience. “You know what? Je’Caryous fuels my audacity car daily, ‘cause I consider myself an extremely audacious woman, and I believe in what I know, even if no one else knows it, because God gave it to me. So I know what I know. That is who Je’Caryous is.”
But the mom of three isn’t the only one in the family who enjoys acting. Eva reveals her daughter Marley has also caught the acting bug.
“It is the most adorable thing you can ever see. She’s got a part in her school play. She's in her chorus, and she loves it,” she says. “I don't know if she loves it, because it's like, mommy does it, so maybe I should do it, but there is something about her.”
Overall, Eva hopes that her contribution to the role and the play as a whole serves as motivation for others to reach for the stars.
“I want them to walk out with hope. I want them to re-vision their dreams. Whatever they were. Whatever they are. To re-see them and then have that thing inside of them say, ‘You know what? I'm going to do that. Whatever dream you put on the back burner, go pick it up.
"Whatever dream you've accomplished, make a new dream, but continue to reach for the stars. Continue to reach for what is beyond what people say we can do, especially as [a] Black collective but especially as Black women. When it comes to us and who we are and what we accept and what we're worth, it's not about having seen it before. It's about knowing that I deserve it.”
This interview has been edited for length and clarity.
Let’s make things inbox official! Sign up for the xoNecole newsletter for love, wellness, career, and exclusive content delivered straight to your inbox.
Feature image by Leon Bennett/WireImage

A part of the reason why this is so important to me is that I have worked from home for years now. Yet whether or not that is your personal testimony, I want to take out some time to encourage you to do all that you can to make your weekend hours at your own house feel as much of an oasis as possible. After all, an oasis is the perfect word for what most of us need right through here, don't you think?
Oasis: something serving as a refuge, relief, or pleasant change from what is usual, annoying, difficult, etc.
If this is exactly what you want, but you need a little help finding some inspiration, I've got 15 tips to help get you started. Ready?
1. Invest in Some Greenery
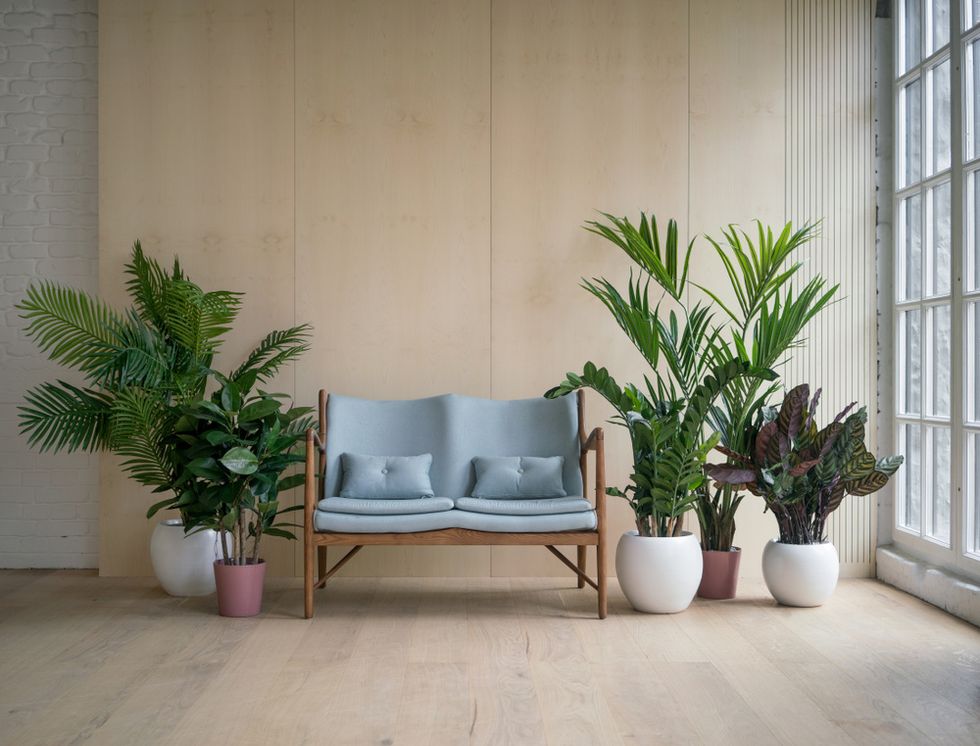
There are a few awesome reasons to have plants in various rooms of your home. They're proven to be able to help to improve your mood, make you more creative, and decrease your stress levels. Growing up, there were quite a few plants in my house, but I must admit that I like my place to be on the darker side, so I don't have any around at present. What I do have is a huge faux tree in one of my rooms, and I adore it to no end.
So, whether it's the real deal (which can also decrease indoor humidity and noise levels) or something that's just for show (click here for some of the best fake greenery around), add some plants to your place. It will definitely—and immediately—create an oasis effect.
2. Make Your Own Scented Candles
Personally, I don't know anyone who isn't close to being totally in love with candles, especially if they're scented. If you happen to be one of them but you've never contemplated the benefits that come from lighting a few of 'em up, candles provide a calming effect. Based on the scent that you choose, they can also appeal to your sense of smell and put you into a better mood. Plus, candles are a wonderful complement if you're someone who likes to meditate, pray, or journal. And, if your oasis is going to consist of a partner being in your space, candles are mad romantic too.
Thing is, candles aren't always or necessarily the cheapest things on the planet. So, if your budget is super tight, something that you might want to do is make some of your own. It might sound like quite the feat at first, but they're actually easier to make than you might think. You can get a thorough walk-through by checking out this article right here.
3. Get Some Big Throw Pillows
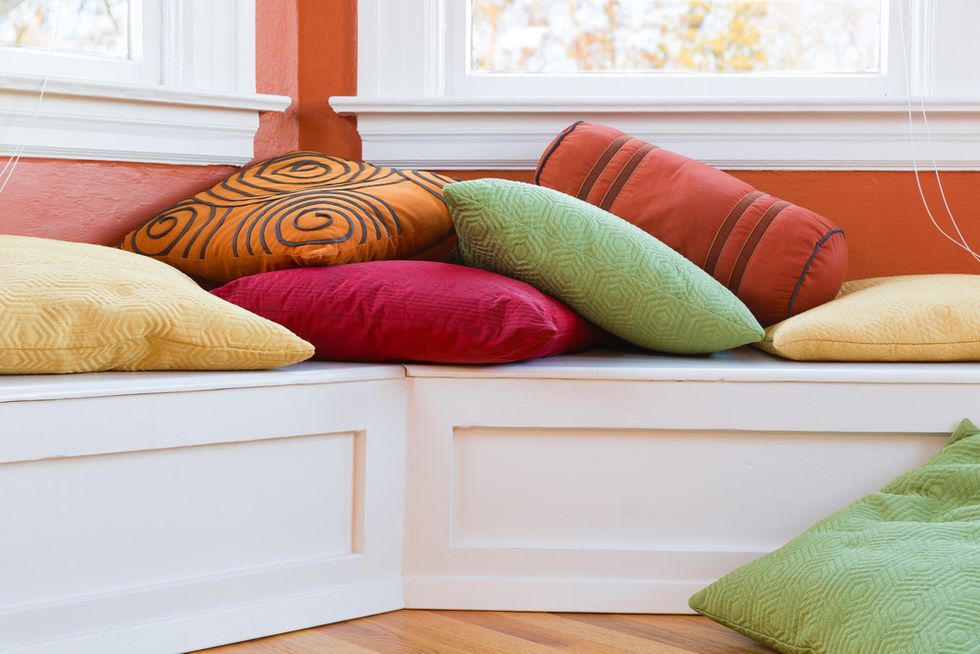
Other than the pillows that you've got on your bed, how many other ones do you own? Something that I dig about big throw pillows is that they immediately make a room look warmer and more appealing. Plus, there's nothing more comfortable than putting a couple of them on the floor and lying on them while listening to some music or watching a movie. As a bonus, many throw pillows are pretty inexpensive.
You can find them everywhere, from Target and Walmart to Big Lots and Bed Bath & Beyond (Apartment Therapy did a feature on where to get some higher-end ones; you can check it out here).
4. Switch Up Your Wall Art
I'm not sure what makes us think that just because we've hung up a particular picture, we can't switch it out with something else. By rotating your wall art, based on your particular mood or even season of the year, not only is it a simple way to avoid getting bored with your décor, but it can totally shift the energy of any given room in your house.
If you want some one-of-a-kind pieces, I've found some really unique and affordable prints on Etsy. Just go to the site and put whatever your favorite kind of art is in the search field.
5. Use Natural Light As Much As Possible
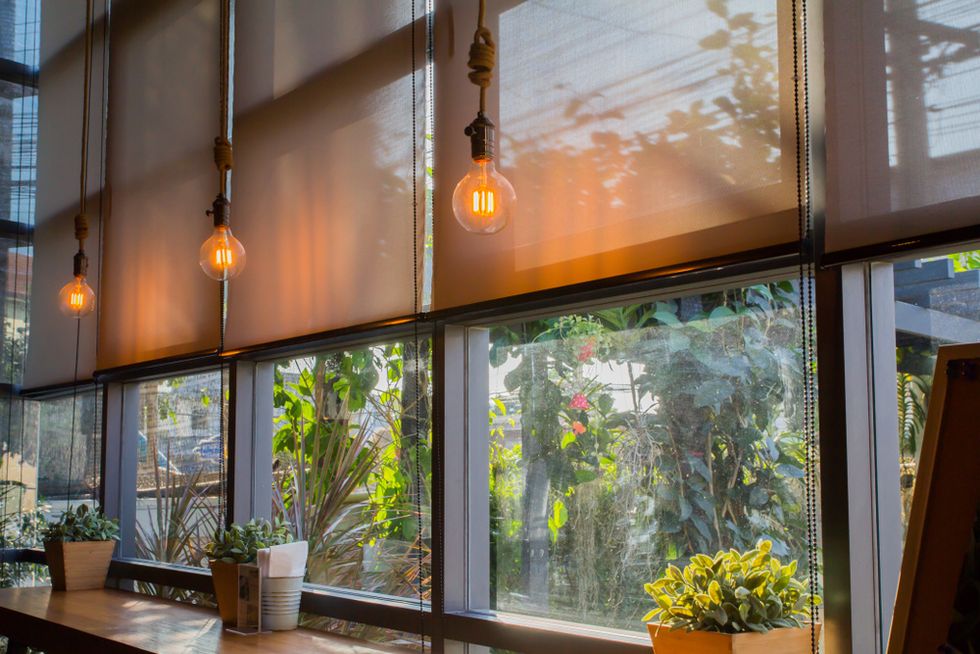
There are a few reasons to make the most of natural light. On the financial tip, it's cheaper than relying on your overhead lights and lamps. Also, natural lighting keeps seasonal depression at bay, helps you to get more vitamin D into your system, and can improve your quality of sleep as well.
If you're someone who is hesitant to open your window treatments up because you're worried that someone can peek in to see what you're up to, there is something called mirror window film that you can apply to your windows. It's cool because it makes it possible for you to look out of your windows while preventing others from being able to look inside of 'em.
Just know that this is designed to work during the day, not at night (as far as looking outside from indoors). Anyway, you can find rolls of the film at a pretty reasonable price at your local home improvement stores.
6. Add More Neutral Hues
If you speak with interior decorators, many of them will say that nothing welcomes the feeling of calm and tranquility quite like neutral colors do. For the record, the four basic hues of neutral are white (which represents purity and cleanliness), black (which represents sophistication and affluence), grey (which represents maturity and reliability) and brown (which represents authenticity and warmth); however, "near neutrals" (which are lighter or darker versions of the four) are great too.
Speaking of colors that are wonderful for creating an oasis-like feeling, pale pastels can also provide a feeling of serenity.
7. Cop Some Seasonal Blankets
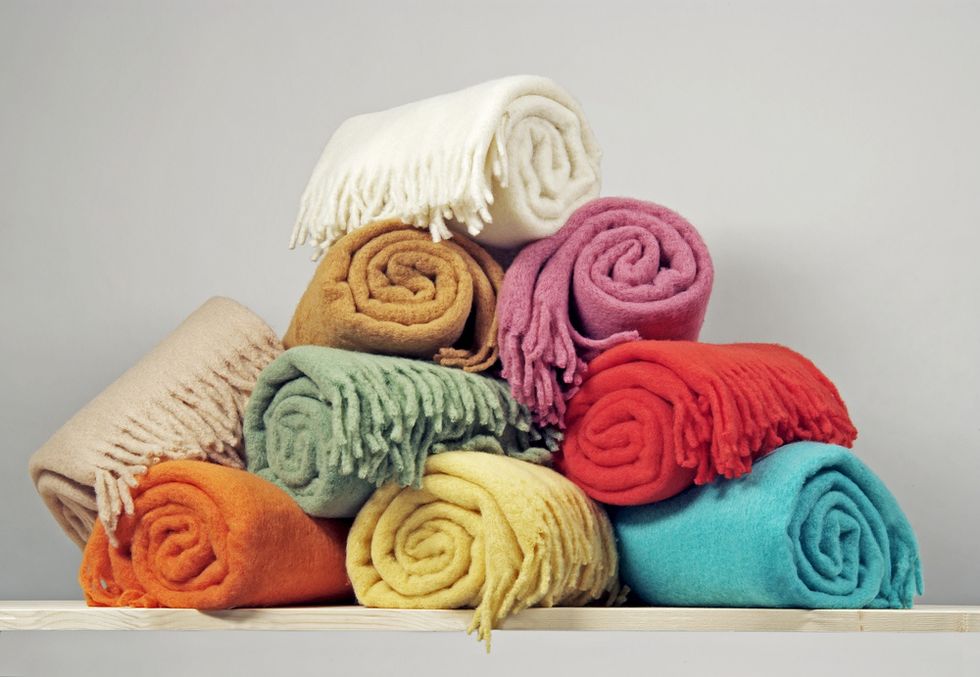
I think one of the best things that I ever did to pamper myself was to purchase several throw blankets. At this point, I believe I've got around 10 of 'em. I just like stringing some along my loveseat and ottomans, so that I can curl up in one at any given moment while I'm chillin' in pretty much any room of my house. Just make sure to get the ones that match the season you're in. Cotton and fleece are ideal for spring and summer, while wool, cable knit, and cashmere are more ideal for the fall and wintertime.
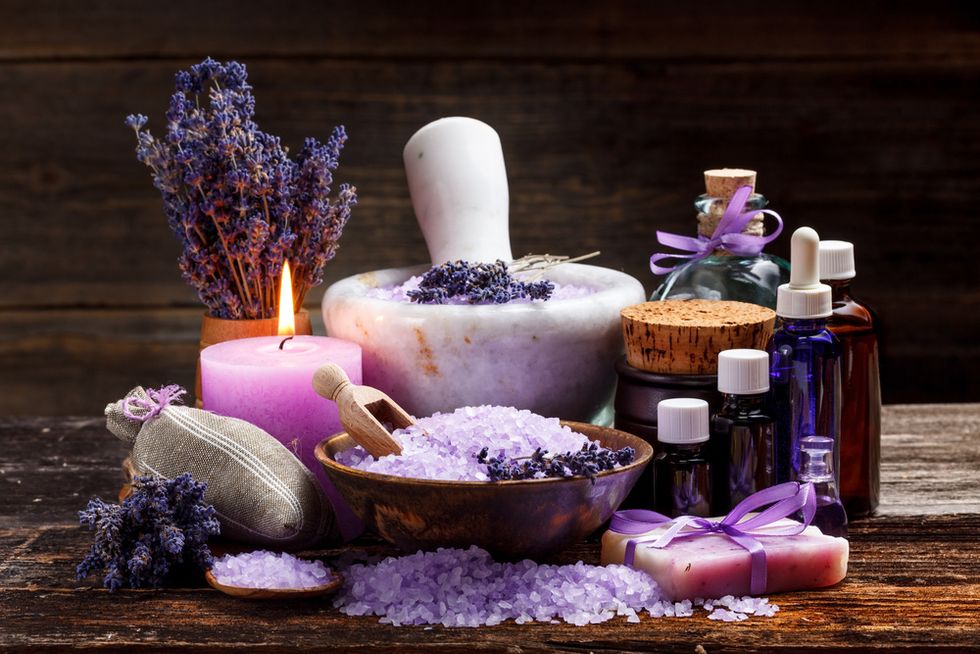
8. Take a Milk Bath
The reason why I wrote the article, "Did You Know There's A Right & A Wrong Way To Take A Bath?" around this time last year is because the reality is, not all baths are created equal. The reason why I also wrote, "Make 'National Bathtub Party Day' Your Favorite Day Of The Year" (which rolls around at the top of every December, by the way) is because soaking in your tub is one of the most cost-effective yet also luxurious ways to pamper yourself. If you opt for taking a milk bath from time to time, depending on the kind of milk that you choose, it can perform mini miracles for your overall health and well-being.
Coconut milk and buttermilk contain lauric acid, which supports the skin and the production of collagen. Oat milk soothes dry skin and eczema-related symptoms. Goat milk helps to gently remove dead skin cells. Plus, all of these milks will moisturize your skin in a way that is simply incomparable. Just pour two cups of your preferred milk under warm running water. Then add 1/3 cup of your favorite carrier oil (like coconut oil, grapeseed oil, sweet almond oil, jojoba oil, or avocado oil) and a few drops of your preferred essential oil to provide an aromatherapy effect. I promise that you will struggle with getting out of your bathtub once you set the stage with all of this holistic healing stuff.
9. Create Your Own Massage Oil
In a perfect world, we'd all have a man who lived to give us massages on demand. But if that's not your personal testimony (mine either, chile), that doesn't mean that you have to deprive yourself. Self-given scalp massages are divine. So is rubbing your feet while you're watching your favorite show on Netflix, Hulu, UMC or a free streaming site Tubi. Just make sure you pamper your scalp or skin with an oil. Warming up something like olive, avocado or Jamaican black castor oil is good for your scalp. As far as your skin is concerned, why not make a divinely scented one? I actually happened upon a site that lists a whopping 22 different DIY massage oil recipes. You can check it out here.
10. Play Some ASMR or Soothing Music
The reason why there are articles on this platform like "Before You Pull Out Your Playlist, This Is How Music Affects Your Sex Life" is because there's no way around the fact that music is powerful—and powerfully influential. From a scientific standpoint, music is proven to do everything from slow down your breathing and heart rate and reduce stress and anxiety to relieve muscle tension and trigger the production of serotonin so that you're calmer and are able to sleep more soundly.
As far as ASMR goes, while it's only been close to a couple of years now, it has gotten to the point where I never turn in for the night without some rain or ocean waves playing in the background. There is an article I once read that said that ASMR actually has the ability to produce "brain orgasms" from a physiological standpoint. So, if you wish you could be at a beach house, trapped indoors on a rainy day, or could hike through a tropical rainforest, hopping on over to YouTube and putting in your favorite nature sounds can be almost just like being there.
11. Sign Up for a Wine Subscription

If there is one thing that gets y'all super hype on this platform, it's wine! I ain't mad about it either because wine is an alcoholic drink that has a significant amount of health benefits; especially if it's red wine. Red wine is scientifically proven to contain antioxidants known as polyphenols that will help to keep your heart healthy, the plant compound resveratrol that helps to lower your blood pressure and improve your cognitive functions, and other properties that assist in lowering depression-related symptoms. Wine also has nutrients that support you having stronger immunity and glowing skin. You can always run up to your closest liquor or even grocery store to get your favorite bottle. Or, if you're like me and you prefer to be indoors as much as possible on the weekends, another option is to join a wine club or subscription box service. You can find over 20 of the best ones by going here.
12. Order Some Takeout
Eating out isn't always the cheapest thing, especially if you're ordering food to be delivered. I'll give you that. But if you want to support local eateries in your area and enjoy a good meal without having to prepare it, that is always an option that you can take advantage of. If you'd prefer to help out a Black-owned restaurant specifically, Eat Okra is a new app that features those in your local area.
13. Or, Eat Some Calm and Comforting Foods
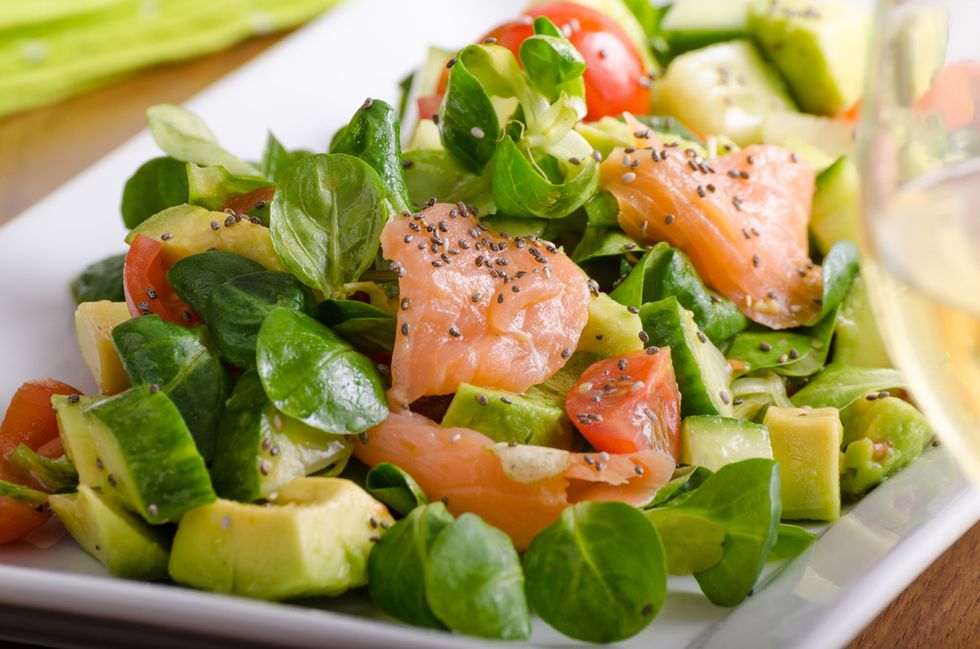
Really. What's the point in cultivating the perfect ambiance if you're gonna be a nervous wreck either way? Sometimes, in the effort to find a little peace and tranquility, we mess up by chowing down on foods that ultimately cause us to climb the walls (umm, like sugar). Certain foods that promote a sense of harmony are featured in the article on our site, "8 Foods That Will Keep You Cool, Calm & Totally Relaxed". Some other foods that didn't make the list, that are both calming and comforting, include homemade soup, sautéed spinach, avocado toast, grilled salmon, and turkey melts.
14. Put Your Phone on Vibrate
Tell me something. If you were on vacation right now, at your favorite spot, would you have your phone with you, 24/7? Unless you're a parent and your kids aren't with you, if your answer is "yes", please check out "8 Solid Reasons To Put. Your Phone. Down." We've got voicemails on our phone for a reason; one of them is so that we can have moments when we're not constantly checking social media notifications or even chatting back and forth with other people.
If you want to create a sense of calm and serenity on your weekends, put your phone on a charger in another room. Whatever is awaiting you on it…it can wait. It really can.
15. Sleep In
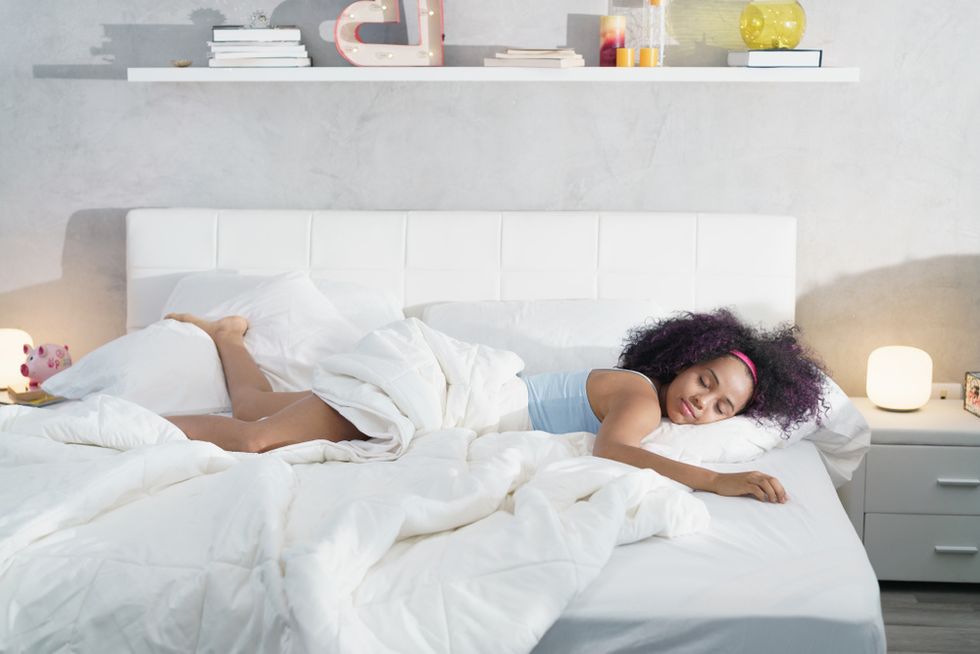
While recently checking out a pretty extensive sleep survey, I noticed that two-thirds of Americans claim to not sleep well during the week. That's a lot of people. If you're one of them, why not use the weekend to get some extra rest in? For the record, there really is no such thing as "catching up on your sleep," but being able to have a couple of days when you don't have to be a slave to your alarm clock—that can be super refreshing and a perfect way to recharge for Monday.
So, definitely make it a point to either go to bed earlier or to stay in bed a little longer on the weekends.
Get some new bedding. Sprinkle some lavender essential oil on your sheets (lavender oil is a natural de-stressor). Drink a little tart cherry juice (the melatonin in it will have you out like a light!). Sleep is a very simple way to get the peace that you've been looking for while you're in the oasis atmosphere that you created for yourself. Make sure that you get some this weekend, aight?
Let’s make things inbox official! Sign up for the xoNecole newsletter for love, wellness, career, and exclusive content delivered straight to your inbox.
Featured image by Delmaine Donson/Getty Images
Originally published on September 12, 2020