Use This DIY Scrub To Have Naturally Glowing Skin
It is no secret that the winter season is not skin's best friend. The dry cold air literally sucks the life out of our skin leaving it extremely dry and sometimes even scaly! In order to keep your skin silky smooth, it's time for operation “keep skin on fleek" to be in full effect.
My skin has been screaming for help but I was not feeling the $20 price tag for a product that I could literally make in my kitchen. Plus, I'm always up for a good DIY project and of course saving a few bucks, so this practical DIY Coconut Sea Salt Scrub seemed like the perfect project to wrap myself in after a long day. For under 10 bucks and 10 minutes, I made a scrub that has my skin feeling absolutely wonderful!
What You'll Need
A Jar/ Container (for your scrub)
Sea Salt (preferably fine)
Coconut Oil (+ any other oils of your choice)
Fresh Lemon Juice (optional)
A Mixing Bowl & Spoon
Step 1: Measure
Add two-parts fine sea salt to one-part oil (you can use courser grains of salt if you plan on using the scrub primarily for feet and elbows). No matter how much of the scrub you plan on making, just make sure the ratio remains 2-to-1. The sea salt helps to lightly buff the skin, while the oil helps to add some moisture and serves as a base.
In my mix, I used both coconut oil (2/3) and grapeseed oil (1/3). I also squeezed ½ of a small lemon into my mixing bowl. Fresh lemon juice, when diluted, has great benefits for the skin such as brightening/evening skin tone and extra exfoliation. To be on the safe side, use the scrub at night time only if you decide to add lemon; exposure to the sun with lemon juice on the skin may cause burning.
Related Article: EYE CREAM, MAKEUP REMOVER + 19 OTHER AMAZING USES FOR COCONUT OIL
Step 2: Mix & Store
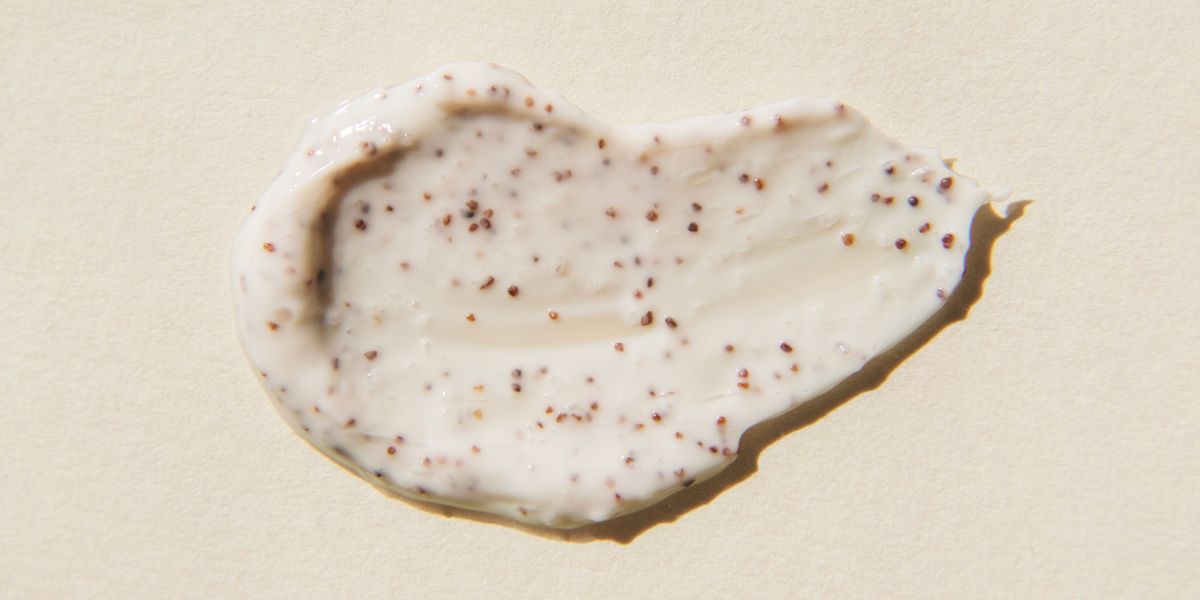
In your mixing bowl go ahead and mix all of the ingredients with a spoon; there's no special method. When it looks like a heterogeneous mixture, you're done mixing. Put the scrub in a jar that will keep air out. I found mine in the Dollar Spot section of Target (my favorite part of the store FYI).
Step 3: Massage & Be amazed!
Now it's time for the moment of truth! Hop in the shower and wash as you would normally. After your last rinse, massage your scrub all over your body to get rid of some of the top layer of dry skin that winter has brought on. Be careful! The oil will make the shower slippery so please, proceed with caution or have a bath mat down.Now wasn't that easy?
My Results
This DIY scrub left my skin feeling so good that I didn't even have to moisturize after getting in the shower because of the coconut oil penetrating my skin and, of course, the sea salt scraping away the layers of dead dry skin. Even on the days that I don't use the scrub, my skin feels much more comfortable than it did before incorporating the scrub into my body-care routine. I used fine sea salt, so I was able to use the scrub two to three times a week instead of just one. Take the time out to listen to your skin to determine what works best for you. Do this treatment at least once a week and your skin will be thanking you by the time Spring makes an appearance.
Are you currently using a DIY Scrub? Share with us below!
ItGirl 100 Honors Black Women Who Create Culture & Put On For Their Cities
As they say, create the change you want to see in this world, besties. That’s why xoNecole linked up with Hyundai for the inaugural ItGirl 100 List, a celebration of 100 Genzennial women who aren’t afraid to pull up their own seats to the table. Across regions and industries, these women embody the essence of discovering self-value through purpose, honey! They're fierce, they’re ultra-creative, and we know they make their cities proud.
VIEW THE FULL ITGIRL 100 LIST HERE.
Don’t forget to also check out the ItGirl Directory, featuring 50 Black-woman-owned marketing and branding agencies, photographers and videographers, publicists, and more.
THE ITGIRL MEMO
I. An ItGirl puts on for her city and masters her self-worth through purpose.
II. An ItGirl celebrates all the things that make her unique.
III. An ItGirl empowers others to become the best versions of themselves.
IV. An ItGirl leads by example, inspiring others through her actions and integrity.
V. An ItGirl paves the way for authenticity and diversity in all aspects of life.
VI. An ItGirl uses the power of her voice to advocate for positive change in the world.
Let’s make things inbox official! Sign up for the xoNecole newsletter for daily love, wellness, career, and exclusive content delivered straight to your inbox.
When it comes to feeding your toddler, it can be either a joy or a challenge, depending on their mood.
Most moms can attest to being held at the will of their child’s everchanging tastes and preferences. While they might love a food item one day, that can quickly change overnight, leaving you to be ready to switch the menu up on a whim.
But lunchtime can still be enjoyable for you and your little one — it’s all about making even the simplest food more playful and creative. Turn hot dogs into edible dogs or sausages into swimming octopuses; even sliced fruits or vegetables can turn into a colorful rainbow with the right finesse.
Lunch Ideas for Toddlers
Presenting your toddler with different textures, colors, and flavors of foods can make mealtime more stimulating and fun, and to help get your creative cooking inspiration going, we’ve provided a few recipes that will get you and your toddler excited about lunchtime!
1. Hot “Dog” Lunch Plate
For a fun hot "dog" lunch plate for your toddler, start by lightly toasting a hot dog bun and cut ¼ of the bun off. With this portion of the bun, place the pieces in half to form a dog’s face and add candy pieces and a blueberry for the eyes and nose.
Cook a chicken or turkey sausage until it's thoroughly heated. Place the sausage inside the bun and add your toddler’s choice of condiments. Serve alongside bite-sized pieces of steamed carrots and cucumber sticks for a balanced and nutritious meal that's sure to please your little one's taste buds!
@heathercoxzzz Kid’s Lunch @heinz_us ketchup #nationalhotdogday #hotdog #funfood #kidslunch #lunch #lunchtime #lunchformykids #kidfood
2. Rainbow Veggie Quesadillas
Create colorful quesadillas using a variety of diced veggies like bell peppers, carrots, and tomatoes. Start by heating a non-stick skillet over medium heat. Lay a tortilla flat in the skillet and sprinkle shredded cheese evenly over one half. Next, invite your toddler to sprinkle diced bell peppers, carrots, and tomatoes on top of the cheese. Fold the tortilla in half and cook until golden brown on both sides, then slice into triangles and serve!
@gleanerskitchen Eat the Rainbow! 🌈🌶🍅🫑🥬 These Colorful Quesadillas are a flavorful way to use up whatever veggies you have in the fridge. Try soft veggies that don’t need a lot of cooking like spinach, tomato, bell pepper and zucchini. Or try it with cooked veggie left overs like squash, carrot, and sweet potatoes. Colorful Quesadillas Via #miharvestofthemonth 8 ounces low-fat cream cheese 1/2 tsp garlic powder 8 whole wheat tortillas 1 cup red pepper, chopped 1/2 cup tomatoes, chopped 1 cup cheddar cheese spinach leaves - 1 cup fresh, (9-ounces frozen, thawed and squeezed dry) cooking spray #snapedworks #gleanerscommunitykitchen #gck #cookingmatters #foodsmarts #eattherainbow #veggierecipes #15minutemeals
3. Mini Cauliflower Pizza
To make mini cauliflower pizza for your toddler, start by preheating your oven to 400°F (200°C). In a food processor, pulse cauliflower florets until they resemble rice. Mix the cauliflower "rice" with grated cheese and an egg, then shape the mixture into small pizza crusts on a baking sheet lined with parchment paper.
Bake for 15-20 minutes until golden brown, then top with tomato sauce, shredded cheese, and your toddler's favorite toppings before baking for an additional 5-7 minutes. Enjoy these mini cauliflower pizzas as a nutritious and fun meal for your little one!
@zenatewhat Cauliflower Mini Pizza🍕 Recipe . INGREDIENTS 240g riced cauliflower 1 large egg 1/2 cup bread crumbs 1 tsp mix herbs (I use the mix herbs blend from @littlepalates) INSTRUCTIONS In a bowl, mix together your egg, breadcrumbs riced cauliflower, and mixed herbs until well combined and sticky. (You can add another egg to get your mixture more sticky) On a lined baking sheet, form your mixture into mini pizza crusts.(I use a cookie cutter to get my desired shape) Bake at 400F for 10-15 minutes. Once baked, add your desired toppings (tomato sauce, cheese, etc) and return to the oven for another 2-3 minutes/until cheese is melted. Allow pizza to cool and enjoy! You can store unused cauliflower crusts in the freezer for a later date. . . #zenatewhat #zensplate #blwmeals #blwjourney #babyfoodie #foodbaby #babymealideas #blwrecipes #cauliflowerrecipes #recipevideo #babymeals #cauliflowerpizza #babypizza #cauliflowerthins #yumminmytummy #whatsonmyplate #babyreels #whatbabyeats #blwbreakfast #blwdinner #blwlunch #blwbreakfastideas #momsoftiktok #momsofinsta #boymom💙 #fyp #foryou #viral #toocute
4. Mini Banana Pancake
Make small, bite-sized pancakes on sticks using a pancake mix and adding mashed bananas into the batter. Serve with a side of yogurt or a fruit dipping sauce for added fun.
@chloebeesley7 Mini banana pancakes for my 1 year olds breakfast! #fyp #blwideas #blw #babyledweaning #toddler #1yearold #toddlerfood #toddlersoftiktok #toddlertok
5. Fruity Parfait Cups
Layer Greek yogurt with diced fruits like berries, mangoes, and kiwis in small cups or jars. Top with a sprinkle of granola or crushed graham crackers for added texture. It's a colorful and nutritious treat that toddlers will love to eat with a spoon!
@gariannestable Back To School Series: Parfait Cups🥝🍓🫐🍦 Ingredients: * granola mixed with honey (so it holds firmly together) * greek yogurt mixed with whipped cream (you can omit the whipped cream but it MAKES the flavor in my opinion) * chopped fruits (whatever you like! here I’m using kiwi, peach, strawberry, blueberry & blackberry) Insert liners into muffin tin and begin to layer in your ingredients! When done, pop in the freezer - make sure to cover it. Grab and go for breakfast or a quick snack! Enjoy✨ #backtoschool #backtoschoolrecipes #easyrecipe #parfait #mealprep #fyp
6. Pizza Rolls
Take two slices of mozzarella cheese and place them on a cooking tray with slices of pepperoni on top. Bake at 400 degrees for 5 minutes. Once cooled, add marinara sauce on top and roll into a small wrap. Leave wrapped or slice into small bite-size pieces and serve it up!
@jorimallory Wanted share this simple recipe for any other moms who sometimes struggle with making quick but healthy meals for picky toddlers like me! #pickytoddlerrecipes #healthydinnerrecipes
7. Octopus Sausage Lunchable
Start by holding a sausage sideways and making two lengthwise cuts, creating four 'legs.' Then, rotate the sausage 90 degrees and make two more cuts, resulting in a total of eight 'legs.' Boil or fry the sausage until cooked, then add sesame seeds for eyes and carve out a mouth using a sharp knife. Arrange the octopus sausage on a Lunchable tray with crackers, cheese slices, and fruit for a fun and interactive meal!
@minas_recipe Tako (octopus) Sausage is a sausage cut to look like an octopus 🐙 and is a popular item to put inside a kids bento box in Japan 🇯🇵 I used Japanese sausages since they are shorter in length but you can use any kind of hot dog as long as you cut them in half! Hold the sausage sideways and cut one half of it lengthwise (not all the way). Turn the sausage over 90 degrees and slice again. Now the sausage has 4 ‘legs’. Cut again between the slits so that you have a total of 8 ‘legs’. You can either boil or fry the hot dogs. Add sesame seeds for the eyes and carve out a mouth using a sharp knife! Enjoy 🐙✨ #foodtok #recipe #toddlerlunchideas #タコウィンナー
Let’s make things inbox official! Sign up for the xoNecole newsletter for love, wellness, career, and exclusive content delivered straight to your inbox.
Featured image by kate_sept2004/Getty Images